
In this section we are going to discuss on automating the calculator application using Robotium, the calculator application we are going to automate is one we developed in our previous blog post “Creating you first Calculator application in android”
You can download the source code of the project from here
Well, we are all set with our AUT (Application Under Test), all we need is to start automating it.
To automate our android application, please read the prerequisite article first
Once Robotium JAR file is downloaded, let’s start creating a test project.
Step 1
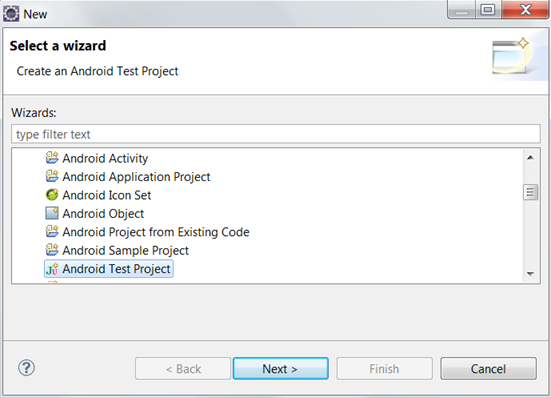
Open Eclipse IDE and Select Fileà New à Others..
Step 2
Select the Android à Android Test Project
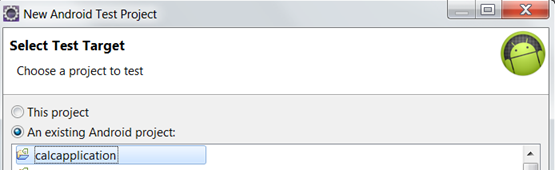
Give the Test Project name (say CalcApplicationTest) and Select the application under test (which is nothing but CalcApplication) which you have downloaded earlier.
Step 3
Once the project is created, the Package explorer looks like this
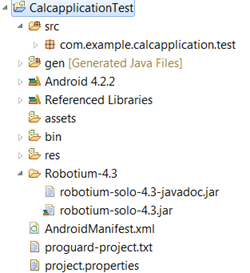
As you can see above, the calcApplicationTest.java is the main java file, which will be called while executing the test.
Step 4
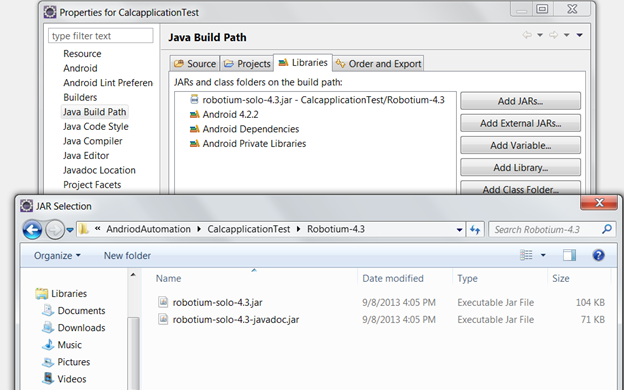
Now add the reference of Robotium to the test project, this you can do by creating a folder called Robotium-4.3 as shown in the above picture and add the two JAR files downloaded.
Right click the project and select configure build path as shown
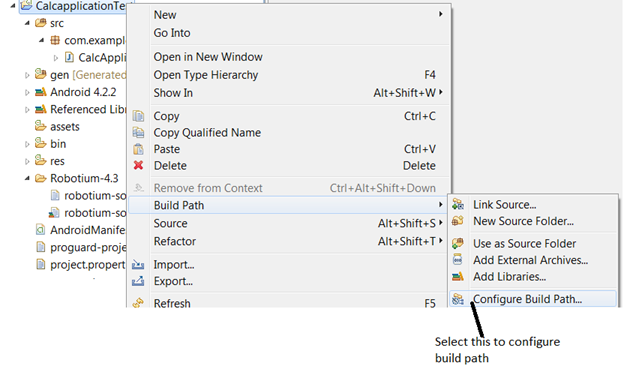
Now select the robotium jar file from the path you have downloaded, from Libraries Tabà Add External Jar as shown
Step 5
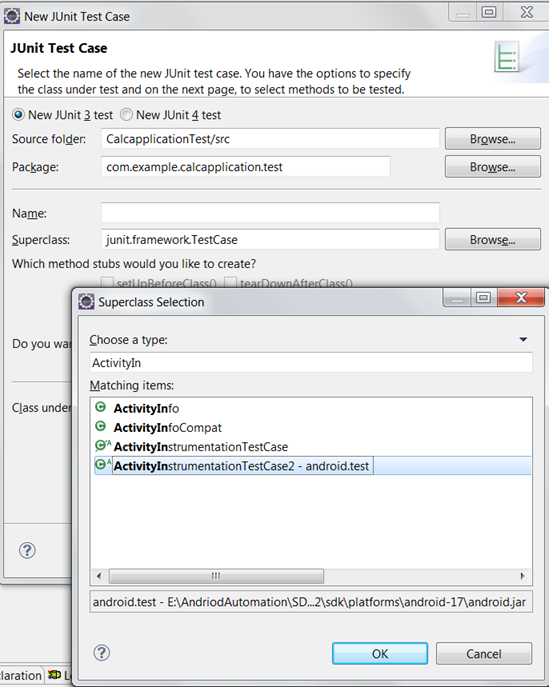
All right, once everything is ready, let’s start writing code, In order to do that, right click on the Package com.example.calcapplication.Test and select Junit Test Case

Once done, in the wizard give the name of the project and select the superclass and search for ActivityInstrumentationTestCase2 as shown below
That’s it, next import the two important packages
- MainActivity (import com.example.calcapplication.MainActivity;)
- R (import com.example.calcapplication.R;)
Remember these two packages actually hold the initialization of application views and reference of all the controls (views) used in application.
Step 6
Create object for Solo Class like this
private Solo solo;
Well what is Solo class, it’s the Main class for development of Robotium tests. Robotium has full support for Views, WebViews, Activities, Dialogs, Menus and Context Menus. Robotium can be used in conjunction with Android test classes like ActivityInstrumentationTestCase2 and SingleLaunchActivityTestCase.
Step 7
In the Setup() method write the following code

This will initialize the Instrumentation and Activity of Application Under Test.
Step 8
Last step is to identify the control and perform operation.
I am going to show a simple step to identify the textbox to enter number 1 in edtno1 and enter text.

Detailed explanation of the above code.
Solo.getView() – This method is to get the view of application under test
We know the view (control) of application reference is found in R class hence we can locate the edtno1 view by giving the fully qualified name R.id.edtno1
Solo.enterText() – This method is to enter the text in view
Here is the full code looks like
package com.example.calcapplication.test;

import com.example.calcapplication.MainActivity;
import com.example.calcapplication.R;
import com.jayway.android.robotium.solo.Solo;
import android.test.ActivityInstrumentationTestCase2;
import android.util.Log;
import android.widget.EditText;
import android.widget.RadioButton;
import android.widget.TextView;


public class CalcApplicationTest extends
		ActivityInstrumentationTestCase2 {

	private String TAG = "CALCULATOR_TEST";

	private Solo solo;

	public CalcApplicationTest() throws ClassNotFoundException{
		super(MainActivity.class);
	}

	@Override
	protected void setUp() throws Exception {
		solo = new Solo(getInstrumentation(), getActivity());
	}

	public void testDialog() throws Exception
	{
		//check if the calculator is launched
		assertTrue(solo.searchText("Calculator"));

		//Declare all the controls to perform operations
		EditText txtVal1 = (EditText) solo.getView(R.id.edtno1);
		EditText txtVal2 = (EditText) solo.getView(R.id.edtno2);
		RadioButton rdbtnMul = (RadioButton) solo.getView(R.id.rdMul);
		TextView viewResult = (TextView) solo.getView(R.id.txtResult);


		//Enter Text in the control
		solo.enterText(txtVal1,"12");
		solo.enterText(txtVal2,"12");

		//check for the result
		Log.d(TAG, "Checking for the results");
		if (viewResult.getText().toString().equalsIgnoreCase("24"))
			Log.d(TAG,"ADD PASSED");
		else
			Log.d(TAG,"ADD FAILED");


		//Click multiply
		solo.clickOnView(rdbtnMul);

		//Verify Multipy stuffs
		if (viewResult.getText().toString().equalsIgnoreCase("144"))
			Log.d(TAG,"MUL PASSED");
		else
			Log.d(TAG,"MUL FAILED");
	}
}
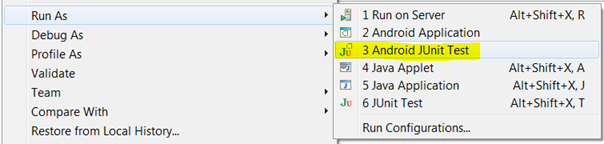
Just execute the code from Eclipse IDE by selecting the project and right click to select Run Asà Android Junit test as shown.
Now this test will automatically call the android emulator and fire-up the application under test and start executing out above code.
You can download the fully functional source code of the project from here (Download)
That’s it !!
Thanks,
Karthik KK

I can’t download the fully functional source code of the project. You can give me the fully functional source code of the project. thank you very much